How to Make Nattō in an Instant Pot

I’m in the Japan Times this week with a lesson about how to make nattō: “One man’s journey to perfect homemade nattō.”

A few weeks back I saw some folks discussing nattō on Twitter, which made me realize that I hadn’t made Japanese breakfast for a while. There was a stretch in 2019 after a business trip to Japan when I ate 和食 breakfast every day for about six months or so.

I had enough to put together miso soup and salmon pretty easily, and I realized that I probably had the equipment to make nattō. I started Googling around a little, and, sure enough, I found Japanese recipes for making nattō using the yogurt setting on an Instant Pot.

Like yogurt, nattō is fermented by bacteria and needs to be held at warm temperatures for enough time for the germs to do their thing. I’ve been brewing beer and making yogurt long enough to have a decent sense of how things work, so I decided to give it a shot. It’s not all that hard!

I found the soybeans pretty easily at one of the Asian market’s near me, but they didn’t have frozen nattō. I put my quest on pause until I saw Hiroko Tabuchi tweet out a picture of 納豆素 from Yuzo Takahashi Laboratory, which was conveniently available on Amazon at the time. The spores are currently sold out but worth looking out for, and there must be somewhere else to purchase them online.

Once you have the soybeans, the spores, and an Instant Pot, you’re just about good to go. Here’s how I did it:

1. Soak the soybeans overnight.

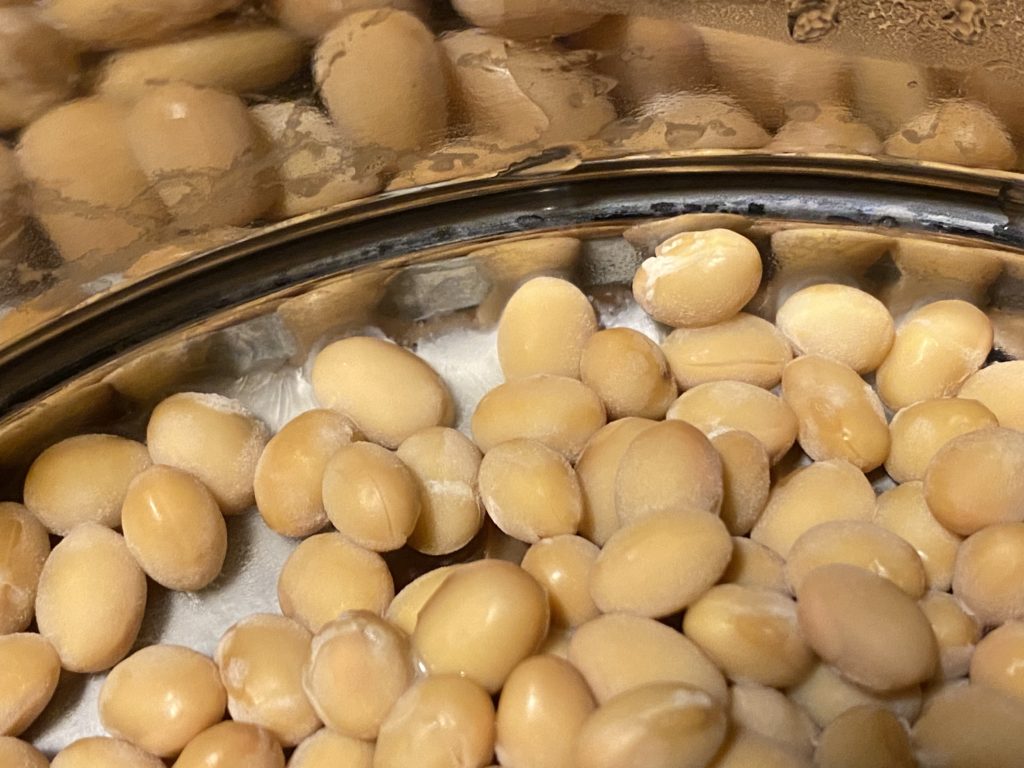
I recommend starting with 100g. Most recipes will recommend 500g, which is far too much. 250g was enough for two weeks’ worth of breakfast. The soybeans will expand and soak up some of the water.

2. Cook the soybeans.

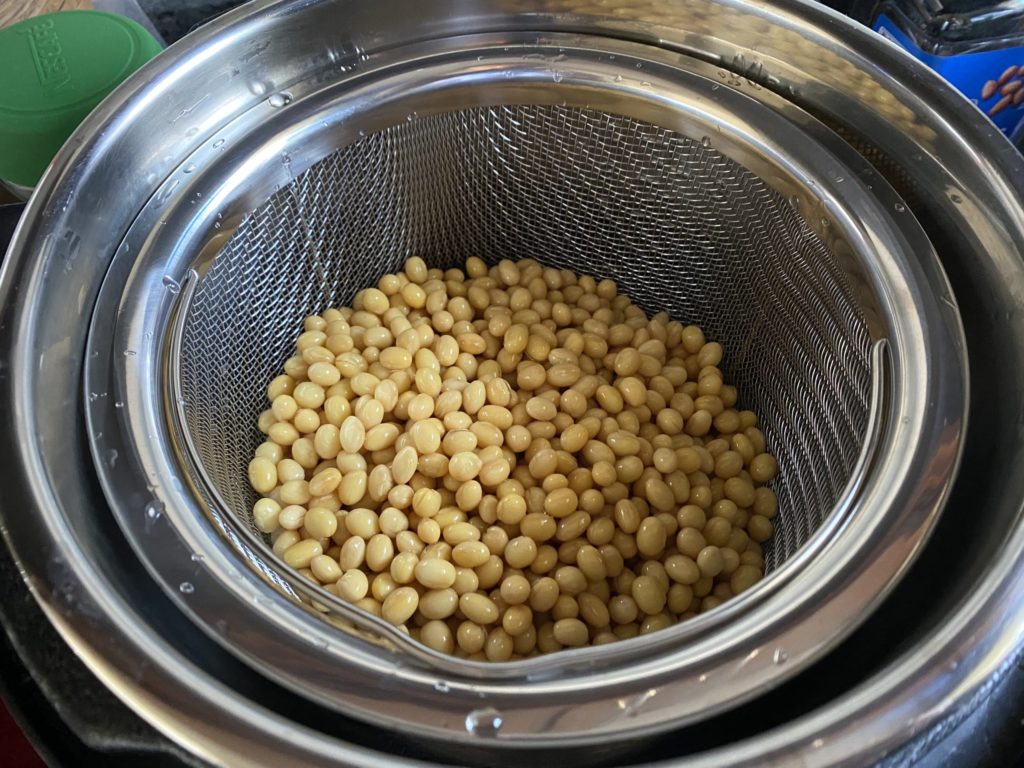
I used a steaming basket with 1.5 cups water in the bottom of the IP, but you could just as easily cook the beans directly in the IP container, in which case you’d need much more water.

If you’re using the steaming basket, you probably should cook on manual for 45-55 minutes, depending on how soft you want your beans. I haven’t perfected the softness yet. The first time I tried, I steamed them for 30 minutes and they were a little firm, so I had to add an additional 10 minutes. I think 55-60 minutes would work. [Update 8/22/20: I did 70 minutes on Manual and they came out perfect.]

If you’re boiling the beans, then I think 30-40 minutes is probably fine in the IP.

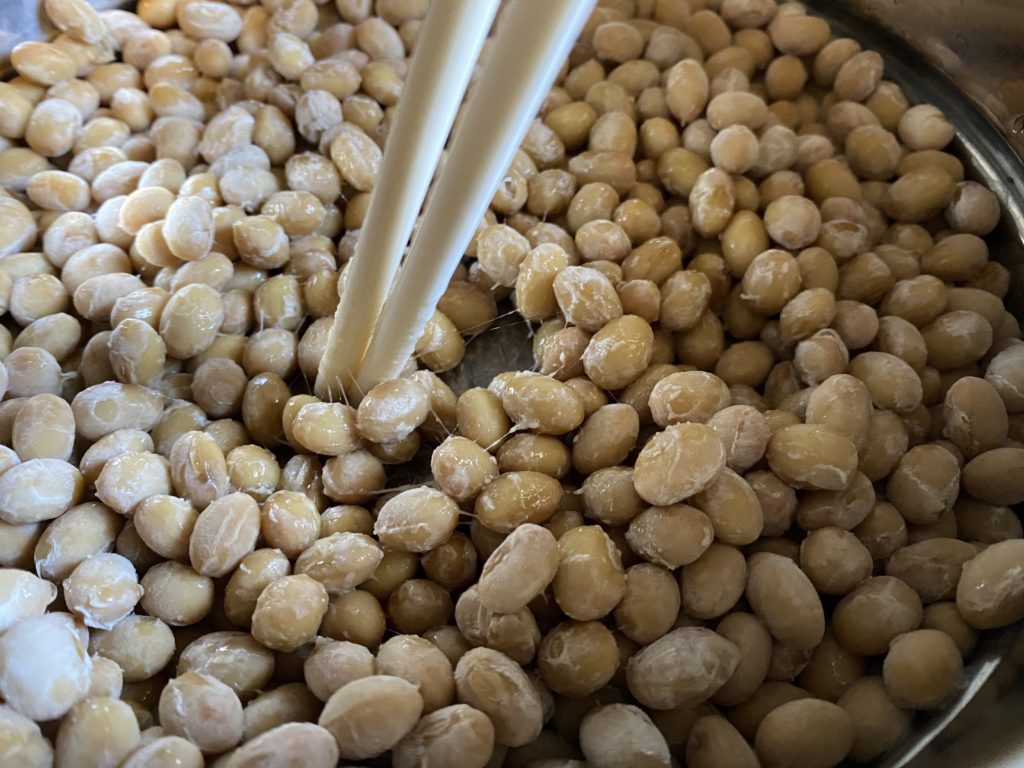
3. Transfer cooked beans into a sanitized container.

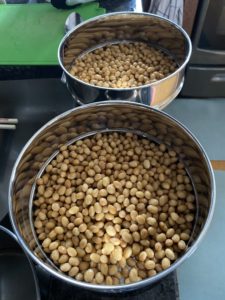
Everything from this point onward needs to be totally sanitized so that you’re not at risk of growing anything other than the nattō bacteria.

You can rinse everything with a sanitizer of some sort like a diluted bleach solution (or StarSan or Iodophor if you happen to be a homebrewer like me). If you’re using a stainless steel container for the beans, you can alternatively give it a quick steam in the IP to nuke everything on it and make sure it’s totally sanitized.

Pot-in-pot stainless steel pots are useful for this. There are two pots in the picture because I made 250g the first time I made them and had to split them up so that the beans didn’t get too deep.

4. Add spores to sanitized water.

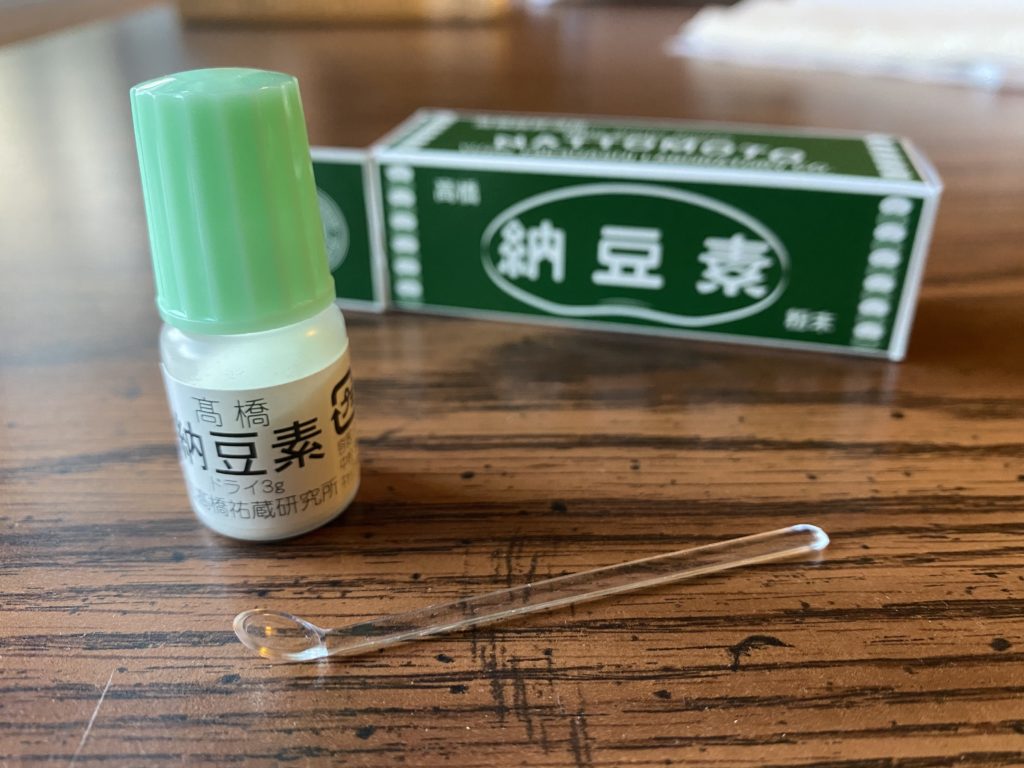
Microwave 10mL of water for a minute or so until it boils, and then let it cool until it’s warm to the touch but not uncomfortably so (around 100F/37C). Then add 0.1g of spores to the water using the special spoon included with the vial of spores. Swirl up the spores in the water.

5. Add the spore water to the soybeans.

Pour the water on the beans and give it a stir with a sanitized spoon.

6. Ferment the soybeans.

Put your container in the IP and set it to the yogurt setting for 24 hours. Now you just wait.

You can look in, but I’d suggest resisting until at least 12 hours in to ensure that the nattō bacteria have a good head start and can outcompete anything else that might sneak in when you’re taking a look.

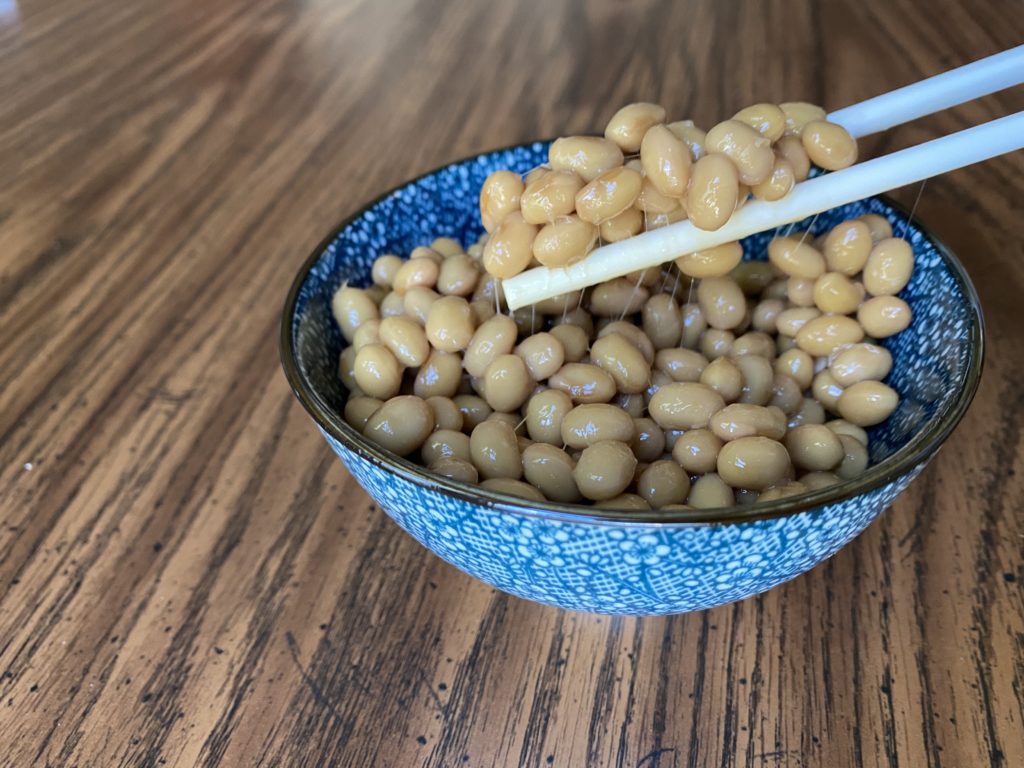
By 12-16 hours you should see the whitish film developing and notice that pungent nattō aroma. The beans will be ready by 24 hours.

7. Refrigerate the nattō overnight.

Pour the nattō into a food-safe container, and refrigerate it overnight. It’s ready to serve!

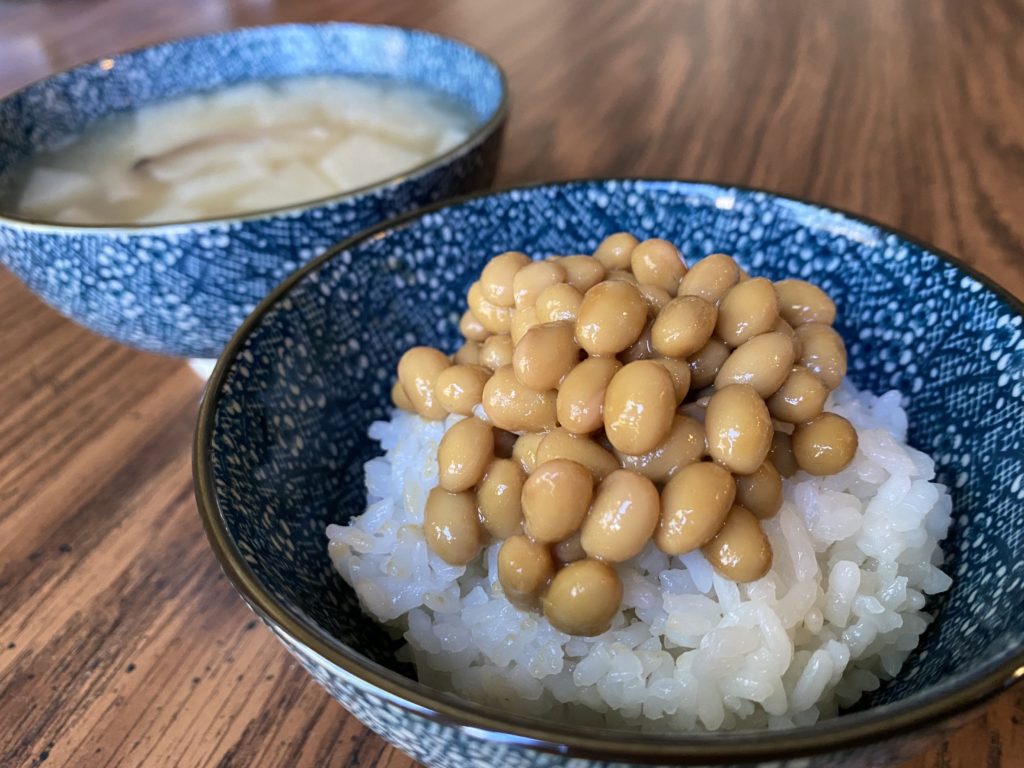
S&B Oriental Mustard is relatively easy to find and makes really good karashi. Alternatively you can check out my nattō experiments video from ancient history for some other recipe options. I think I’ll have to try the avocado version again sometime soon…

Natto Experiments

Three ways to spice up your nattō experience:

Natto Experiments from Daniel Morales on Vimeo.

Garlic Nattō – This is the only original recipe of the three. I came home Tuesday after work feeling sick and decided that I was clearly suffering from garlic insufficiency. I didn’t have much else in the fridge other than a couple of packages of nattō, and thus garlic nattō was born. It actually does a surprisingly good job of covering up the beany funk. You can add red pepper to taste (add after turning the flame off). Not bad. Final answer: ★★

Avocado Wasabi Nattō – This was recommended by a former classmate. I often eat avocado alone with wasabi-jōyu (I love saying that word… wasabi-jōyu) as a side dish for sushi or other Japanese food. One of the English teachers I worked with in Aizu recommended it to me. He said it tastes just like maguro, which it kind of does! It’s not a bad match with nattō, either. Next time I’ll be sure to use a larger portion of wasabi-jōyu, you can see in the video that the portion I use just barely covers the avocado. Final answer: ★★★★

Cheese Nattō – My town used to serve this for school lunches sometimes. The cheese they used was white and much milder. Cheddar has a better bite to it. It doesn’t mask the nattō funk as much as the garlic, but it does give it a cheesy kick. Pretty tasty. I had a small serving of niku-jaga as a side dish, a very nice match. Final answer: ★★★

How to Bank Mad Cash in Japan

My freshman year of college, four guys on the floor above me saved their spare change the entire year and ended up with $400. They spent it all on booze for a final party, and because we were freshman and not yet legal, they sent the booze home along different routes; prudent since one of them ran into the Freshman Dean and had his portion confiscated.

Saving loose change might be a nice way to save up a little extra cash in the US, but in Japan, it can be a way to raise some serious fundage:


How to Bank Mad Cash in Japan from Daniel Morales on Vimeo.

I was pretty surprised by the relative value of change across the world. US change is practically worthless compared to Japanese coins. It’s 10 times less valuable! In Japan, that $400 my friends saved would have been closer to $4000!

Studies have shown that consumers are less likely to spend bills of larger denomination, and I think this is probably true of the coins in Japan – personally, I feel like I’m more likely to use 100 yen coins than 500 yen coins given a choice.

Because coins in Japan are so valuable (could you ever pay for your phone bill in quarters?), I think this brings about another corollary – people probably undervalue change compared to bills. For any given purchase, I believe people would be more willing to make the purchase with coins and less willing to make the purchase with bills.

A quick example. You’re waiting for a train and see a vending machine. Hmm, maybe I’ll get a water, you think. You fumble around in your pockets and produce 80 yen, not enough for a drink. Now you have to make the decision to break a bill. The above study shows that you’re increasingly less likely to break that bill as the denomination increases. If you’d had the coinage for it, you aren’t forced to make these psychological decisions, and it’s easier just to spend the cash. For whatever reason coins just feel less valuable.

But this comes back to bite you in Japan. We’re more willing to use these coins without realizing that they’re actually worth quite a bit of money, especially that big, beautiful 500 yen coin that’s worth $5.

Here’s some quick math. Say you save around 4-5 coins a day. That’s somewhere around 400 yen/day x 100 days = 40,000 yen = roughly $400. Double that and you can put aside $800 in just over half a year.

Let’s take this even further. Say you put away one 500-yen coin every day. That’s 500 yen/day x 300 days = 150,000 yen or $1500 in less than a full year! They actually make special piggy banks for this exact purpose – parents can teach their kids how to save money and make it fun.

For this project I went on a really strict change diet. I tried to use as little change as possible, going out of my way to use bills and emptying my pockets whenever I got home. The results are clear. From August of last year to April of this year, I saved around 120,000 yen in 500 and 100 yen coins alone. I still haven’t banked the smaller change, but I think it will add another 10-20,000 yen.

For your own change diet, you can vary how strict you are with yourself to achieve the results you want. Manage your bank account as you normally would, and make decisions based on that. Forget about the change for now and just bag it up. It’s easy enough to switch back to bills – my bank lets me deposit it straight into my account. It only took me about 15 minutes at lunch, but my backpack was ridiculously heavy on the morning commute.